¶ Overview
3D printing may look complex at first, but the entire process follows a simple, repeatable workflow. This guide walks you through each stage in a clear way so you always know what to expect before your print even starts.
The four core stages:
- Create or obtain a 3D model
- Export it into a usable file format (STL / 3MF / OBJ)
- Slice it into G-code using a slicer
- Print on your 3D printer
¶ Step 1. Creating a 3D Model
Every print begins with a digital 3D model — a virtual representation of the object you want to produce. It defines the shape, size, and structure of what your printer will build.
How to Create a Model:
- CAD Software
Programs like Tinkercad, Fusion 360, SolidWorks, or Blender allow you to design parts from scratch. Great for functional parts or creative projects. - 3D Scanning
A scanner can convert real-world objects into printable 3D shapes.

Common file types:
- STL – Most widely used; contains only geometry.
- 3MF – More advanced; can include colors, textures, and multiple objects.
- OBJ – Geometry + optional color/texture information.
Where to Get Ready-Made Models:
If you don’t want to design from scratch, you can download models from sites like MakerWorld, Thingiverse, or MyMiniFactory.
Most downloadable models come as STL or 3MF, ready to load in your slicer.
Beginner Tip:
Start with simple, pre-made STL files. They’re compatible with almost every printer and slicer and make learning easier.
¶ Step 2. Preparing Your Model File
Before slicing, make sure your file is organized and ready.
Check and Organize the File
- Confirm it’s in a supported format (STL, 3MF, OBJ).
- Save it in an easy-to-find location.
- Ensure the model fits inside your printer’s build volume.
Software Compatibility
Most slicers — Bambu Studio, Orca Slicer, Cura, Creality Slicer, QidiPrint, Elegoo Cura, etc. — can open STL and 3MF files directly.
Step 3. Slicing
Slicing converts your 3D model into G-code, the instruction file your printer uses to move, heat, and extrude filament.
Think of slicing as the “translation step” from digital design to physical object.
How to Slice (Example Using Orca Slicer)
- Open Orca Slicer (or your preferred slicer).
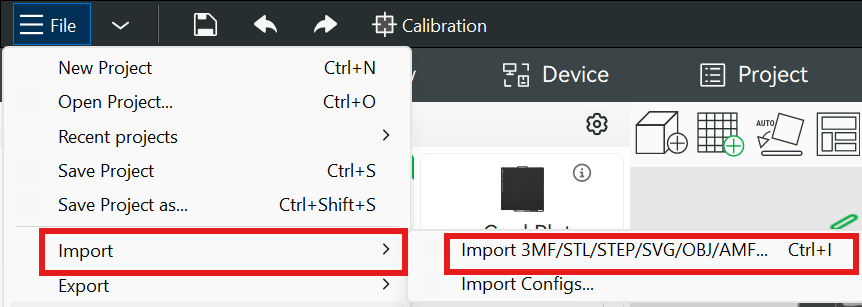
- Import your model — click Import/Add Model and select your STL or 3MF.
- Choose your printer and filament profile.
Orca Slicer includes many manufacturer-specific presets.
Presets load recommended speed, temperature, and flow settings automatically.
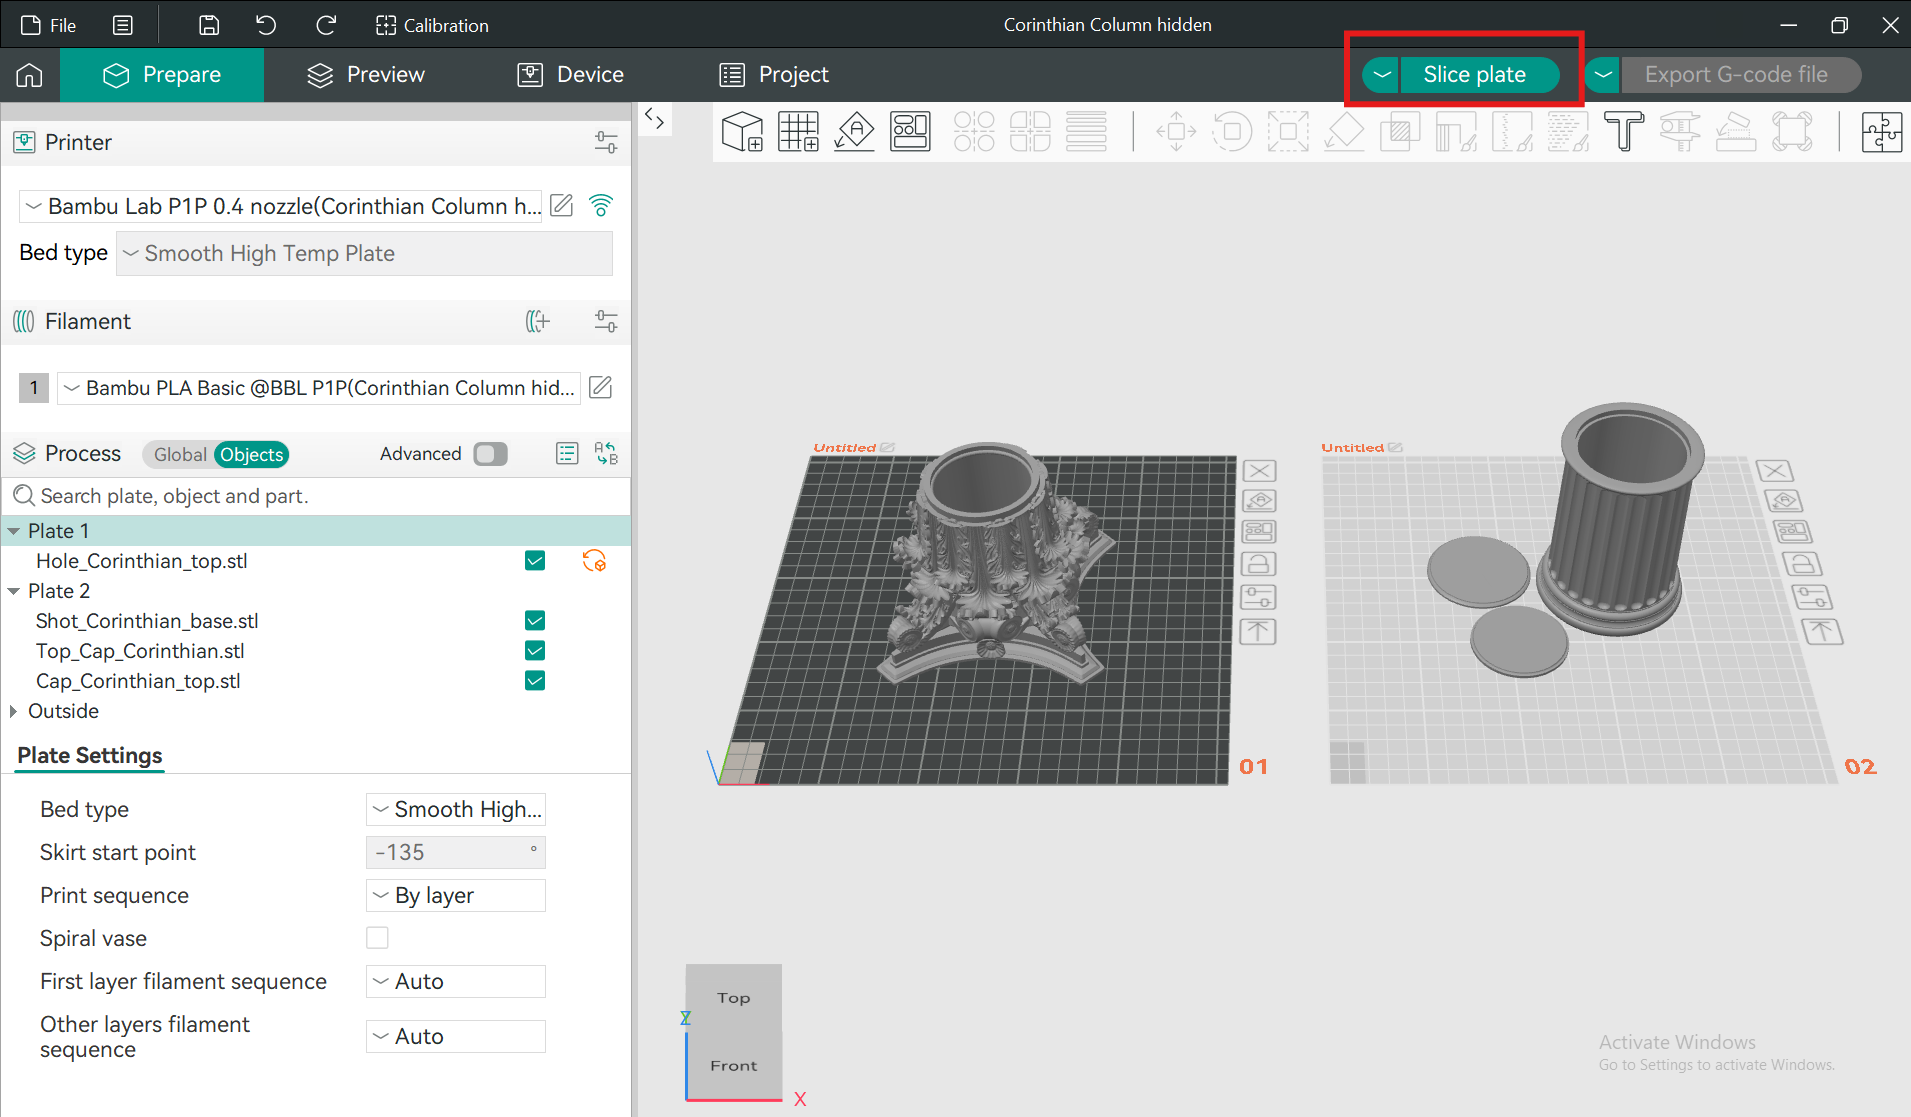
4. Adjust print settings if needed.
5. Click Slice to generate G-code.
(Optional) Preview the layers to see how the printer will build the object.
Tip: If you’re using Overture filament, make setup easier by loading our presets.
These profiles give you reliable temperatures, flow values, cooling settings, and speeds right from the start.
👉 How to Use Overture Filament Presets in Orca Slicer and Bambu Studio
¶ Step 4. Printing the Model
Now your G-code is ready — time to make the digital design real.
How FDM Printing Works
Most hobby printers use FDM (Fused Deposition Modeling). The printer melts filament and deposits it layer by layer until your object is complete.
How to Start the Print
1. Send the G-code to the printer
Via SD card, USB, or Wi-Fi (depending on model).
2. Prepare the printer
- Load filament
- Level the bed (or confirm auto-level is enabled)
- Ensure the build plate is clean
3. Start the print
Tip: Watch the first layer carefully.
Good adhesion and smooth extrusion are signs that your setup is correct.
If the first layer fails, cancel early — it saves time, filament, and frustration.
¶ Step 5. Post-Processing (Optional but Useful)
After printing, you may want to refine or finish your part depending on your needs.
Common Post-Processing Methods
- Sanding
Smooth visible layer lines. Start with coarse grit, finish with fine grit. - Painting or Priming
Add color or a finished surface look. - Gluing and Assembly
For multi-part prints, use CA glue, epoxy, or friction-fit joints. - Heat-treating / Annealing (for some filaments)
Improves strength and temperature resistance (mostly for PLA, ABS, Nylon).

Summary: The 3D Printing Workflow
| Stage | What Happens | Example Tools / Files |
|---|---|---|
| Create a Model | Design or scan your object | Fusion 360, Tinkercad, Blender, 3D scanners |
| Prepare File | Save in slicer-compatible format | STL, 3MF, OBJ |
| Slice | Convert model into G-code | Orca Slicer, Cura, Bambu Studio |
| Printer builds object layer by layer | Creality, Bambu Lab, Elegoo, Qidi | |
| Post-Process | Clean, smooth, or finish the print | Sanding, painting |